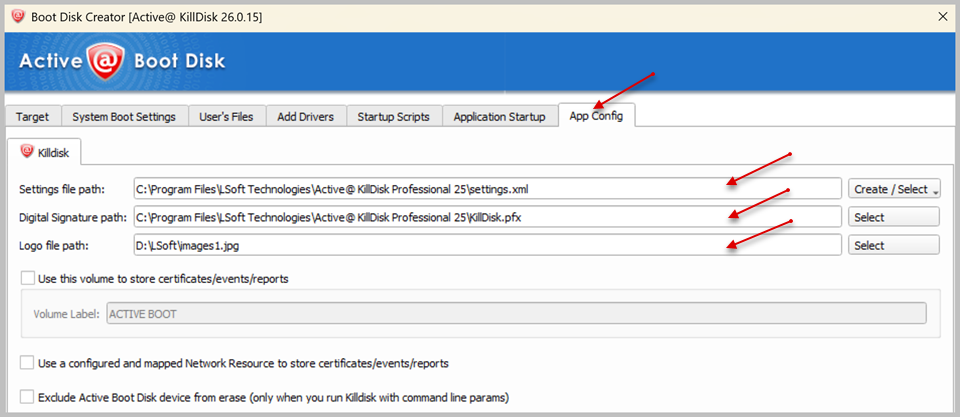
How do I configure the Active@ KillDisk application settings in Boot Disk Creator? Launch Active@ KillDisk locally on your computer. Configure the Active@ KillDisk application using Preferences. For more information about Preferences please refer to our User Guide. Close Active@ KillDisk and launch Boot Disk Creator. Go to the App Config tab. Set the path to the Active@ KillDisk Settings file. By default, this is: C:\Program Files\LSoft Technologies\Active@ KillDisk Professional xx\settings.xml Set the path to the Digital Signature file used for PDF certificates. By default, this is: C:\Program Files\LSoft Technologies\Active@ KillDisk Professional xx\KillDisk.pfx Set the path to the Logo file. Select any additional options as needed. Once these settings are configured, they will be applied automatically to Active@ KillDisk whenever it runs from the created bootable device. Related tasksCan I automatically map a network drive when booting up into Active@ Boot Disk for Windows?Related informationAutomating Erasure with Active@ KillDiskHow to select the path for saving Certificates and Reports?How to use Command Line Parameters?How to use Batch Mode?How do I exclude the boot USB drive from erasure?How to use Startup Scripts?