How to use Startup Scripts?
This document walks you through configuring Active@ KillDisk so that it starts erasing drives automatically as soon as the bootable media loads.
This script applies to Active@ KillDisk versions 10 and below (Windows Boot Disk based on WinPE 5.1 and earlier). If you use KillDisk version 11 and higher (Windows Boot Disk based on WinPE 10), some legacy command-line tools referenced in older scripts — most notably WMIC — are being phased out by Microsoft and are no longer guaranteed to be available on current WinPE builds. The script below has been updated to use PowerShell/CIM instead. We also recommend using the -ci (-ComputerID) command-line option to include a unique Computer ID in the certificate. See Help for details.
To use PowerShell inside WinPE, make sure the WinPE-PowerShell optional component (and its prerequisites: WinPE-WMI, WinPE-NetFx, WinPE-Scripting) is added to your boot image when building it with the Windows ADK.
            @ECHO OFF
            ::Filename: KD-SCRIPT.CMD
            ::----------------------------------------------------------------------------------
            ::Sample netsh command to assign a static IP address.
            ::The following command configures the interface named "Ethernet"
            ::with the static IP address 192.168.0.100, the subnet mask of 255.255.255.0,
            ::and a default gateway of 192.168.0.1
            netsh int ip set address "Ethernet" static 192.168.0.100 255.255.255.0 192.168.0.1 1

            ::----------------------------------------------------------------------------------
            ::Mapping a network drive using the Windows "Net Use" command.
            ::Usage: net use [devicename | *] [\\computername\sharename[\volume]] [password | *]] [/user:[domainname\]username]
            ::
            ::SECURITY NOTE: This example stores the network password in plain text inside
            ::the script, which will be readable by anyone with access to the boot USB drive.
            ::Use a dedicated, limited-permission account for this share, and avoid using
            ::privileged credentials in startup scripts.
            net use o: \\LA\Storage password /USER:myAccount

            ::----------------------------------------------------------------------------------
            ::Find the volume letter of the bootable media that KillDisk is running from.
            ::This searches for KILLDISK.INI on all volumes and copies it to a temporary
            ::location (X:\), so the settings file can be referenced and updated locally
            ::before the erase operation starts.
            FOR %%i IN (c d e f g h i j k l m n o p q r s t u v w x y z) DO IF EXIST %%i:\User_Files\KILLDISK.INI (
            SET DrvLtr=%%i
            GOTO END )
            :END
            COPY %DrvLtr%:\User_Files\KILLDISK.INI X:\KILLDISK.INI

            ::----------------------------------------------------------------------------------
            ::Get the Service Tag / Asset number of the system using PowerShell (CIM),
            ::since the legacy WMIC utility is being removed from current Windows releases.
            ::The values are then stored directly into the KILLDISK.INI settings file.
            ::Once erasure is complete, the PDF certificate will include this information.
            FOR /F "usebackq delims=" %%i IN (`powershell -NoProfile -Command "(Get-CimInstance Win32_BIOS).SerialNumber"`) DO SET servicetag=%%i
            FOR /F "usebackq delims=" %%i IN (`powershell -NoProfile -Command "(Get-CimInstance Win32_BaseBoard).SerialNumber"`) DO SET servicetag2=%%i
            ECHO logComments="Bios Serial Number: %servicetag%, Motherboard Serial Number: %servicetag2%">>X:\KILLDISK.INI

            ::----------------------------------------------------------------------------------
            ::Append the Service Tag number to the KILLDISK.LOG file (with a date/time stamp).
            ::This can only be added to the LOG file after KillDisk has finished erasing the drive.
            ECHO %date% %time:~0,8% ServiceTag#: %servicetag% ServiceTag2#: %servicetag2%>>X:\KILLDISK.LOG

            ::----------------------------------------------------------------------------------
            ::Launch KillDisk and erase the primary hard drive.
            ::  -ip="X:\"   input path for the settings/INI file
            ::  -cp="X:\"   output path for the certificate
            ::  -eh=80h     erase the hard drive with BIOS device ID 80h (primary drive)
            ::  -em=2       erase method #2 (see command-line reference for the full list)
            ::  -nc         no confirmation prompt before starting
            ::  -bm         batch mode (run unattended, no GUI interaction required)
            ::For the full list of KillDisk command-line options, see:
            ::https://www.killdisk.com/commandline_win.htm
            KILLDISK -ip="X:\\" -cp="X:\\" -eh=80h -em=2 -nc -bm

            ::----------------------------------------------------------------------------------
            ::Copy the KillDisk certificate (PDF) and log file from the temporary location (X:\)
            ::to your mapped network drive, or to another location such as a USB flash drive.
            COPY X:\*.pdf O:\
            COPY X:\KILLDISK.LOG O:\

            ::----------------------------------------------------------------------------------
            :EOF
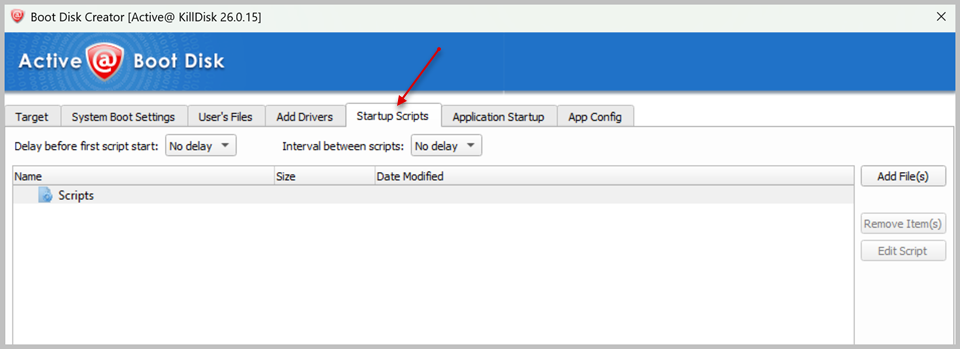
Add your startup script (.cmd) file in the Startup Scripts section of Boot Disk Creator when creating the bootable device.